Network Monitoring Tool: How to install LibreNMS on Centos 8
Overview:
In this video, we will learn about, how to install Network Monitoring tool LibreNMS in Latest Centos 8.2.
Little Intro about what is LibreNMS:
LibreNMS is an open-source, full of features with automatically network discovery network monitoring tool that supports almost all types of network devices like Next-Generation Firewalls, Routers, Cisco, Juniper, HP switches, Linux, windows servers, Access Points, Security gateways, FreeBSD, Printers, VMware ESXi hosts, and many others.
LibreNMS Features:
1. LibreNMS has ability to auto-discover the whole network using the protocols like, CDP (Cisco Discovery Protocol), FDP (Foundry Discovery Protocol), LLDP (Link Layer Discovery Protocol), OSPF (Open Shortest Path First), BGP (Border Gateway Protocol), SNMP (Simple Network Management Protocol) and ARP (Address Resolution Protocol).
2. LibreNMS offer many authentication methods like, (AD) Active Directory, LDAP (Lightweight Directory Access Protocol), HTTP (Hypertext Transfer Protocol), Radius and MYSQL.
3. It’s gives us simple but powerful interactive interface to manage your Network Device.
4. You can also do customization of Dashboard as per your requirement.
5. Its support TFA (Two Factor Authentication) and auto updating.
6. Support Status Map.
7. You can integrate LibreNMS with many other tools like syslog, gralog, Rancid/Oxidized.
8. LibreNMS support traffic billing system.
9. It’s also supports very responsive and customizable alert system its sends notification
10. LibreNMS will sends you notification via email if anything will happen to your network devices. It’s have very responsive and customizable alert system.
11. It can support Android and IOS Applications.
Hardware Requirement:
Below is the Basic hardware requirement for LibreNMS server.
Processor: 2 Core Higher is the best
Memory: 2GB Higher is the best
Storage: 120GB SSD is recommended for faster log access.
Prerequisites:
· Centos 8.2 Sever
· Root Privileges
Install PHP version 7.3 or higher
Step:01 Updating the System:
Set the Hostname with below command.
[root@localhost ~] # hostnamectl set-hostname librenms
Step:02 Updating the System:
It is highly recommended that always up to date the system. To do this type the below mention command and hit enter.
[root@librenms ~] # dnf update or yum update –y
Step:03 Updating the System:
Next we need to install the both repositories Epel and Remi one by one. These repositories are needed while the installation of LibreNMS server. All dependencies of LibreNMS is including in these repositories so it is mandatory to install these repositories before the installation of LibreNMS server.
Epel Repository Installation:
You need to type the below command for the installation of
epel repository.
[root@librenms ~]# dnf -y
install https://dl.fedoraproject.org/pub/epel/epel-release-latest-8.noarch.rpm
Remi Repository Installation:
Type the below command to install Remi Repository.
[root@librenms
~]# dnf -y install https://rpms.remirepo.net/enterprise/remi-release-8.rpm
Step:04 Disable Selinux:
Next, we need to disable the SElinux so that it will not disturb the installation process of our monitoring server.
[root@librenms ~]# getenforce (To
Check Selinux Status)
[root@librenms ~]# setenforce 0
[root@librenms ~]# sed -i ‘s/SELINUX=enforcing/SELINUX=disabled/g’
/etc/selinux/config
You can disable the selinux manually like below method. Go to the below directory and change the value “Enforcing” to disable.
[root@librenms s~] # vim /etc/selinux/config
Change the value and save the settings. Reboot your server after Channing the SElinux configuration.
Step:05 Installation of NGINX Webserver:
Nginx is a powerful webserver in this guide we will install Nginx with LibreNMS server. Type the below command to install the NGINX server.
[root@librenms ~]# dnf –y install nginx
After installation of Nginx webserver start the services of the webserver and also enable it to run automatically at system startup.
[root@librenms ~]
# systemctl start nginx
[root@librenms ~] # systemctl enable nginx
By default, webserver is using port 80 we can check that port with the below command.
[root@librenms ~] # netstat -tlpn | grep 80
Nginx is successfully installed.
Step:06 Dependencies Installation:
Lưu ý: nếu cài php không đúng phiên bản thì sau khi cài lại phải làm lại từ bước này
Here we need to install some dependencies that is mandatory for libreNMS Server. This will install the MariaDB , SNMP Server and PHP related dependencies.
[root@librenms ~] # dnf install php bash-completion cronie fping git ImageMagick mariadb-server mtr net-snmp net-snmp-utils nginx nmap php-fpm php-cli php-common php-curl php-gd php-json php-mbstring php-process php-snmp php-xml php-zip php-mysqlnd python3 python3-PyMySQL python3-redis python3-memcached python3-pip rrdtool unzip
Next update the pear repository with the below commands.
[root@librenms ~] # pear channel-update pear.php.net
[root@librenms ~] # pear install Net_IPv4-1.3.4
[root@librenms ~] # pear install Net_IPv6-1.2.2b2
Step:07 Creation of LibreNMS User:
The below command will create the librenms user with custom directory and shell access and change the group to apache.
[root@librenms ~] # useradd librenms -d /opt/librenms -M -r -s /usr/bin/bash
[root@librenms ~] # usermod -a -G librenms apache
Step:07 Time Zone Setting in the PHP.
Check the current system time Zone by typing the below command.
[root@librenms ~] # timedatectl
To change the time zone in the php file go to the below mention path and type the command and uncomment the date.timezone line as given below. Set timezone as per your time setting. Quit and save.
[root@librenms ~] # vim /etc/php.ini
or you can directly type the below command with your timezone setting.
[root@librenms ~] # timedatectl set-timezone Aisa/Karachi
Step:08 Download LibreNMS Package:
now we need to download the LibreNMS server package to do this go to the below directory and clone the package.
[root@librenms ~] # cd /opt/
[root@librenms opt] # git clone https://github.com/librenms/librenms.git librenms
Now we need to set the permission for directories.
[root@librenms opt] # chown -R librenms:librenms /opt/librenms
[root@librenms opt] # chmod 771 /opt/librenms
[root@librenms opt]# setfacl
-d -m g::rwx /opt/librenms/rrd /opt/librenms/logs
/opt/librenms/bootstrap/cache/ /opt/librenms/storage/
[root@librenms opt]# setfacl -R -m g::rwx /opt/librenms/rrd /opt/librenms/logs /opt/librenms/bootstrap/cache/ /opt/librenms/storage/
Next we need to install the PHP dependencies to do this switch to librenms user and type the below command.
[root@librenms ~] # su - librenms
[librenms@librenms ~]$ ./scripts/composer_wrapper.php install --no-dev
Nếu không tương thích bản php sẽ báo lỗi ở đây!!!
You can see that the script is successfully run.
[librenms@librenms ~]$ exit
Step:09 Database Configurations:
At this point, we need to configure the Mariadb database for our monitoring server. Mariadb database is the fork of the MySQL and its quit alike to mysql server.
[root@librenms ~] # systemctl start
mariadb.service (Mariadb
Start Services)
[root@librenms ~] # systemctl enable mariadb.service (Madiadb
Startup Boot)
[root@librenms ~] # systemctl status mariadb.service (Madiadb
Service Status)
Here, you need
to secure the MariaDB database by running the below command.
This will help you to implement the some security features like Removing
Anonymous Users, Disable Root Login Remotely, Remove the Test
Database and access to it.
[root@librenms ~]# mysql_secure_installation
In this point we need to Set the root password to log into the Mariadb.
In the second session, we will remove the anonymous users. In the 3rd session we will remove the test database that is come by default with Mariadb.
Next, Login into the Mysql Server and create the database for LibreNMS server.
[root@observium ~]# mysql -u root -p
MariaDB [(none)]> CREATE DATABASE librenms CHARACTER SET utf8 COLLATE utf8_unicode_ci;
MariaDB [(none)]> CREATE USER 'librenms'@'localhost' IDENTIFIED BY 'Znx1_425';
MariaDB [(none)]> GRANT ALL PRIVILEGES ON librenms.* TO 'librenms'@'localhost';
MariaDB [(none)]> FLUSH PRIVILEGES;
MariaDB [(none)]> exit
Now, go to the MariaDB config file and add the following files in it.
[root@librenms ~]# vim /etc/my.cnf.d/mariadb-server.cnf
innodb_file_per_table=1
lower_case_table_names=0
After that restart the Mariadb servies.
[root@librenms ~] # systemctl restart mariadb.service (Madiadb Service Restart)
Step:10 Configuring PHP-FPM:
[root@librenms ~] # cp /etc/php-fpm.d/www.conf /etc/php-fpm.d/librenms.conf
Now edit the below file and change the values accordingly.
[root@librenms ~] # vim /etc/php-fpm.d/librenms.conf
Change [www] to [librenms]:
[librenms]Change User and Group to "librenms":
User = librenms
Group = librenms
Change listen to a unique name:
listen = /run/php-fpm-librenms.sock
Now php-fpm is ready to go. Next we need to configure the Webserver Nginx.
Configuring WebServer Nginx:
Create a new file with the name of librenms.conf and past the below code into it. Change the server name as per accordingly.
[root@librenms ~] # vim /etc/nginx/conf.d/librenms.conf
server {
listen 80;
server_name librenms.example.com;
root /opt/librenms/html;
index index.php;
charset utf-8;
gzip on;
gzip_types text/css application/javascript text/javascript application/x-javascript image/svg+xml text/plain text/xsd text/xsl text/xml image/x-icon;
location / {
try_files $uri $uri/ /index.php?$query_string;
}
location ~ [^/]\.php(/|$) {
fastcgi_pass unix:/run/php-fpm-librenms.sock;
fastcgi_split_path_info ^(.+\.php)(/.+)$;
include fastcgi.conf;
}
location ~ /\.(?!well-known).* {
deny all;
}
}
Next disable the Server Session from the main file of Nginx /etc/nginx/nginx.config
Dưới dòng include ta them dấu # vào đầu dòng
Commit the server Session and save the file.
Type the following commands to enable the Nginx and PHP-FPM server on the system bootup time also start the nginx services.
[root@librenms
~]# systemctl enable --now nginx
[root@librenms ~]# systemctl enable --now php-fpm
[root@librenms ~]# systemctl start nginx.service
[root@librenms ~]# systemctl restart nginx.service
Step:11 adding firewall rules:
We can either disable the system firewall with the below command:
[root@librenms ~] # systemctl stop firewalld.service
[root@librenms ~] # systemctl disable firewalld.service
[root@librenms ~] # systemctl status firewalld.service
Or you can allow http, https services in the firewalld.
[root@librenms ~] # firewall-cmd --zone public --add-service http
[root@librenms ~] # firewall-cmd --permanent --zone public --add-service http
[root@librenms ~] # firewall-cmd --zone public --add-service https
[root@librenms ~] # firewall-cmd --permanent --zone public --add-service https
[root@librenms ~] #
Step:12 SNMP Configurations:
Copy snmpd.conf file into the /opt/librenms directory and past it /etc/snmp/ directory. Type the below command it will ask you do you want to over right you must say yes.
[root@librenms ~] # cp /opt/librenms/snmpd.conf.example /etc/snmp/snmpd.conf
Next edit the snmpd.conf file and change the Snmp Community string as per your requirement.
[root@librenms librenms]# vim /etc/snmp/snmpd.conf
or you can delete all the values in the file and add only below line.
rocommunity public 10.1.128.143 // bỏ dòng này
the Snmp string is Public along with the IP address of the Librenms server.
After that run the below command
[root@librenms librenms] # curl -o /usr/bin/distro https://raw.githubusercontent.com/librenms/librenms-agent/master/snmp/distro
[root@librenms librenms] # chmod +x /usr/bin/distro
[root@librenms librenms] # systemctl enable snmpd.service
[root@librenms librenms]# systemctl restart snmpd.service
Step:13 CRON JOB Configuration:
LibreNMS server has its own crob job configuration file all you just need to copy the file and past into the following directory.
[root@librenms librenms]# cp /opt/librenms/librenms.nonroot.cron /etc/cron.d/librenms
Step:14 Copy LOGROTATE Configuration:
LibreNMS keeps logs into the directory /opt/librenms/logs. Over the time these logs are become large and be rotated out.
[root@librenms librenms]# cp /opt/librenms/misc/librenms.logrotate /etc/logrotate.d/librenms
Step:15 LibreNMS Web Installer:
In this point enter the IP or hostname of the server into the browser and hit enter.
You can see that we have old version of PHP so therefore, we need to update the php version with the below method.
Step:15 Upgradation of PHP:
The below command will show you the listed php version.
[root@librenms librenms]# sudo dnf module list php
Next type the below command to install the latest version of php which is 7.4
[root@librenms librenms]# sudo dnf module reset php
[root@librenms librenms]# sudo dnf module enable php:remi-7.4
[root@librenms librenms]# sudo dnf install php
You can check the version of the php with the below command.
Now we have the latest version of php 7.4. Go to the browser and refresh the browser page. Now this time php version error has been remove.
Now, click on the configure database button.
And type the credentials of the database that we have recently created and then click on the check credentials button.
Over database credentials are correct.
Password: Znx1_425
Next click on the Build Database button and hit enter.
Next create the admin user for LibreNMS server.
Admin/hcmuns
Now, admin user has been created.
Next click on the finish installer button
We have successfully install LibreNMS Network Monitoring Sever.
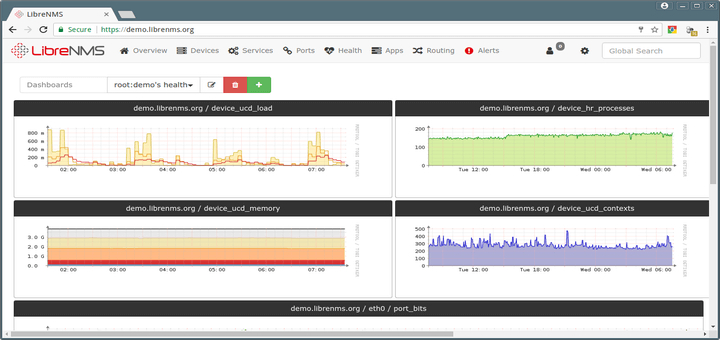
You can set LibreNMS dashboard as per your requirement.
Step:16 Adding Host in LibreNMS Server:
Here, add the host into the LibreNMS server to monitor its hardware resources. To do this go to the devices and click on the add device button and press enter.
Under Devices client on the> add Device
Here you need to enter the IP address of the endpoint system SNMP version and its SNMP String and click on the add device button.
You can see that our endpoint machine is successfully added into the Monitoring server.
It will take some time around 5 to 10 minutes to fetch the information from the client. After sometime our endpoint device will look like below.
Chú ý:
- Librenms nên cài đặt PHP 7.3 trở lên và cài trước
- lưu ý database/password
- Sau khi cài đặt, truy cập bằng IP có thể thêm host, nhưng không thể edit được dashboard, tiến hành phân giải địa chỉ IP của Librenms server thành 1 domain name và phân giải bởi dns server nội bộ.
Nhận xét
Đăng nhận xét